preserving the season
a recipe for marmalade

Welcome to mama eats, a twice-weekly newsletter inspired by a simple + seasonal home life. This week’s post, a recipe for marmalade, is free to all readers, barring the video of me making it which is viewable by paid subscribers. I try to provide as much free content as possible, however, this newsletter is a labor of love and I am a busy mother of three. If you have the means and find value in what I share, please consider becoming a paid subscriber, which also gives you the benefit of access to the growing archive (posts over a month old).
note: this post is a reprint of an original post of mine from March 2020, with some edits to the recipe, and a video (added at the very end; for paid subscribers) from cooking this year’s batch (2024) for (hopefully helpful) visual cues.
Citrus season here is long and bountiful. We are at the tail end of it now, but still as we walk around town I see the dark green trees heavy with their orbs of scarlet orange. I always associate marmellata with my grandmother. At our house growing up, we never really had marmalade, I’m not sure why, maybe my mom just didn’t prefer it. The rarity made it even more enticing, exotic even. My grandmother would spread it thickly over buttered toast, the translucent orange half moons of the rind glistening like jewels. Along with a cup of milky tea, it made a perfect winter treat.
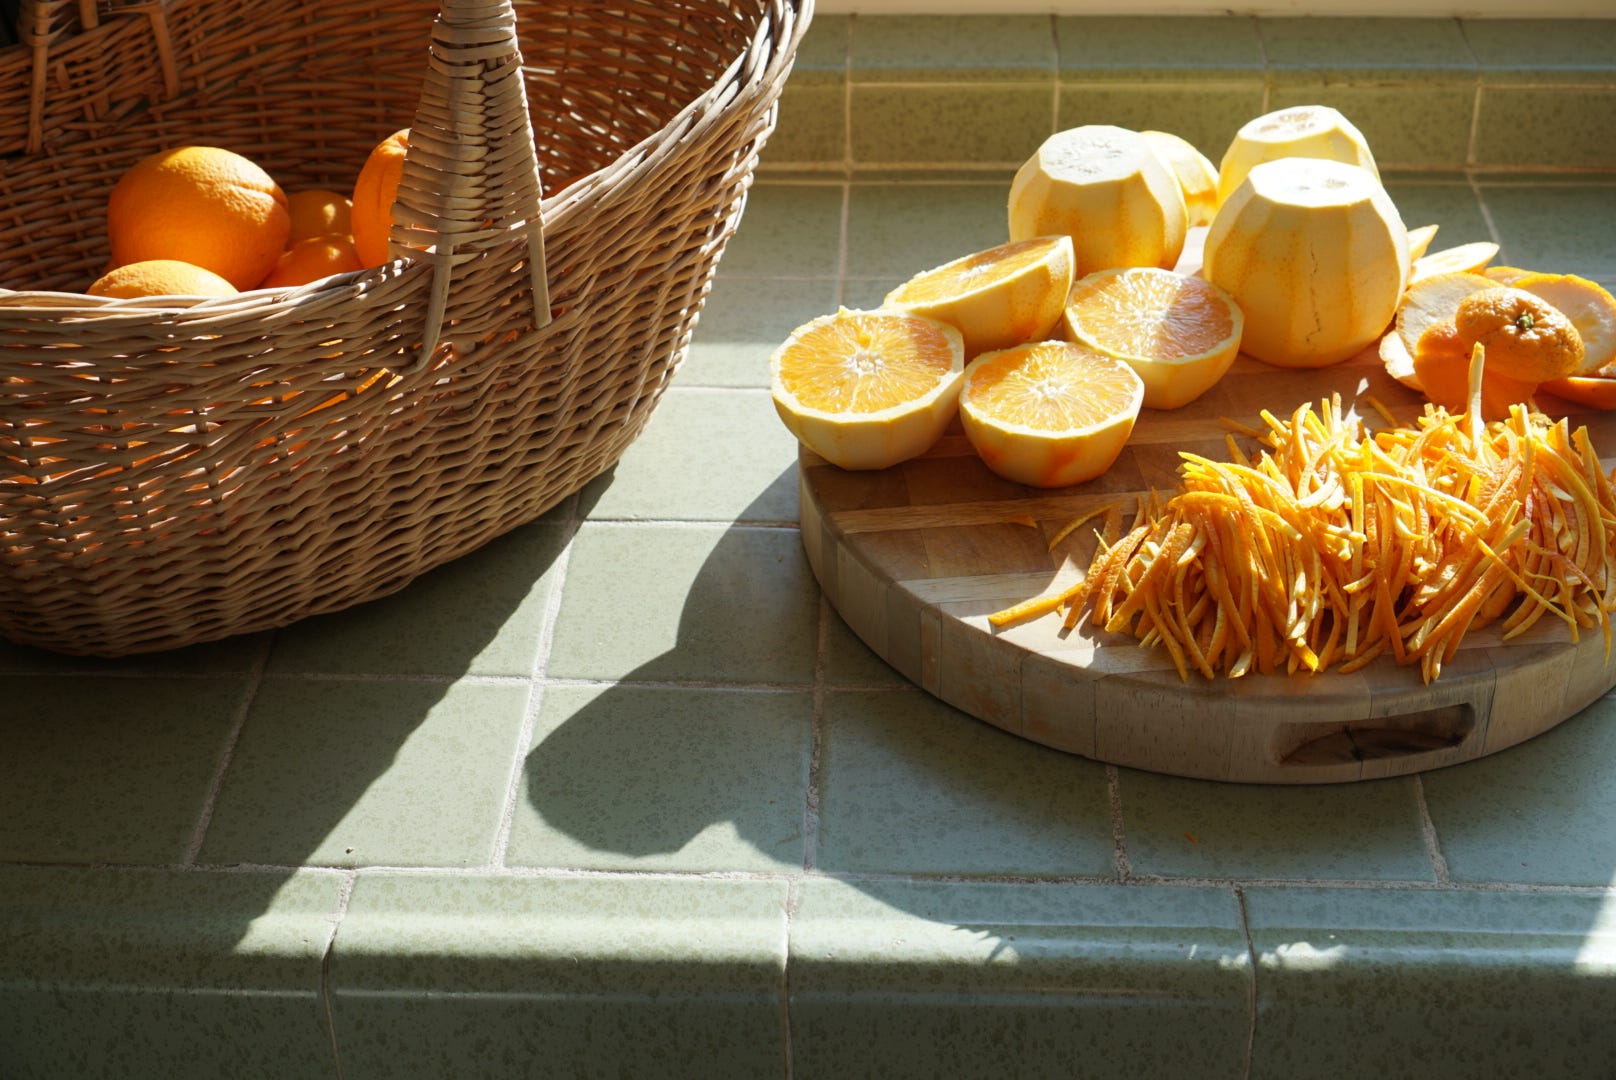
They had 2 orange trees, a Valencia for the summer and a navel for the winter, which meant lots of marmalade. In her opinion, though, real marmalade should be made with bitter Seville oranges. Lamented was the fact that at the state capitol, one city over from us, there were many Seville trees, boughs thick with fragrant clusters of oranges. Perfect, except that people are prohibited from picking the trees. Forbidden fruit, a personal garden of Eden with arance amare, bitter oranges. “No matter,” I always thought as a kid, regular orange marmalade being delicious all the same, bitter oranges be damned. A mental note was formed though, filed away really, so that when I came across a basket piled high with the elusive Sevilles a few weeks ago, I thought, felt compulsed, really, to make marmalade.
Having never made marmalade myself before, this was a bold undertaking. I had made jam before, but how does one make marmalade, I wondered. You can’t just throw the oranges and sugar into a pot and boil away, like you do with other fruit jams. I asked my gram, and she told me how she did it, how a friend did it, and if I should want to use pectin, how the pectin packet recommended you do it. I knew I didn’t want to use pectin, having rather regretted the grainier texture results with past jams of my repertoire. In the end, I turned to an old and torn cookbook, the page splattered a bit so you know it must be good, or at least have been made and used and loved. After the first batch, I became somewhat singular-minded, greedy, and put up 2 more batches to ensure a longer supply. These subsequent batches were with oranges from our own navel orange tree. The Seville orange marmalade is, unsurprisingly, much more bitter with less of a bright orange flavor. I like both kinds, and it coincidentally was a wonderful time to make jam, as by then the COVID-19 isolation restrictions were in place, and what better to do with time than create. Something to enjoy now, and also later.
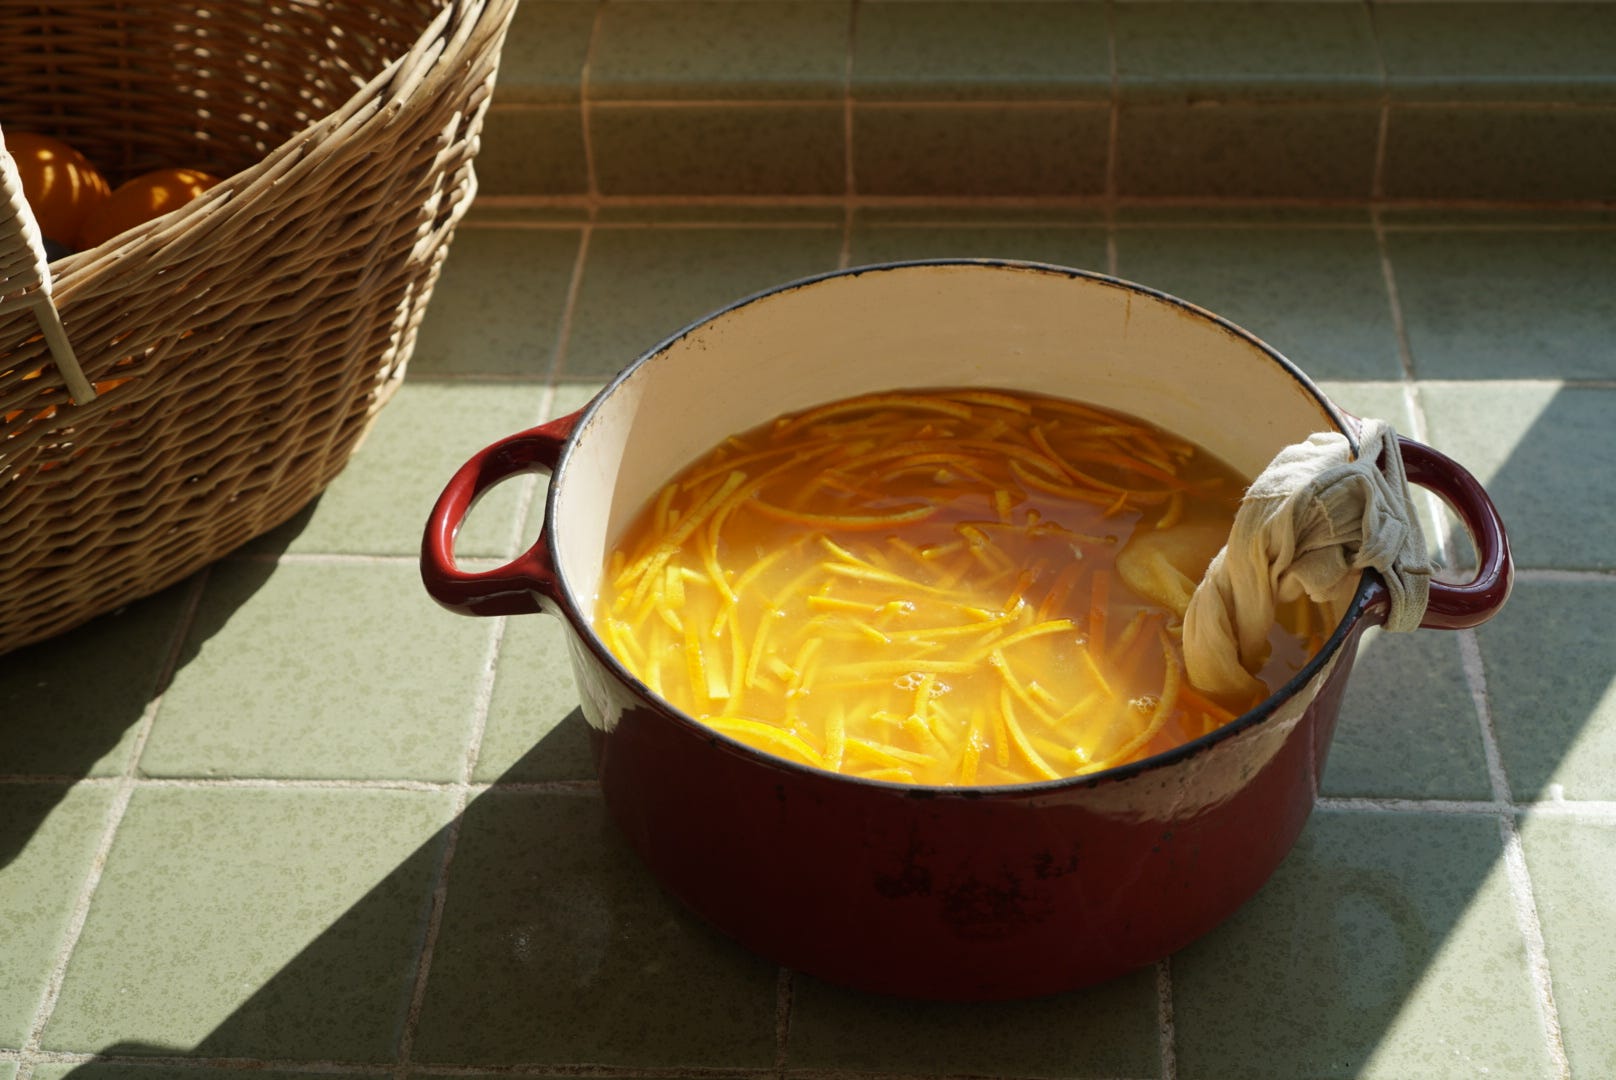
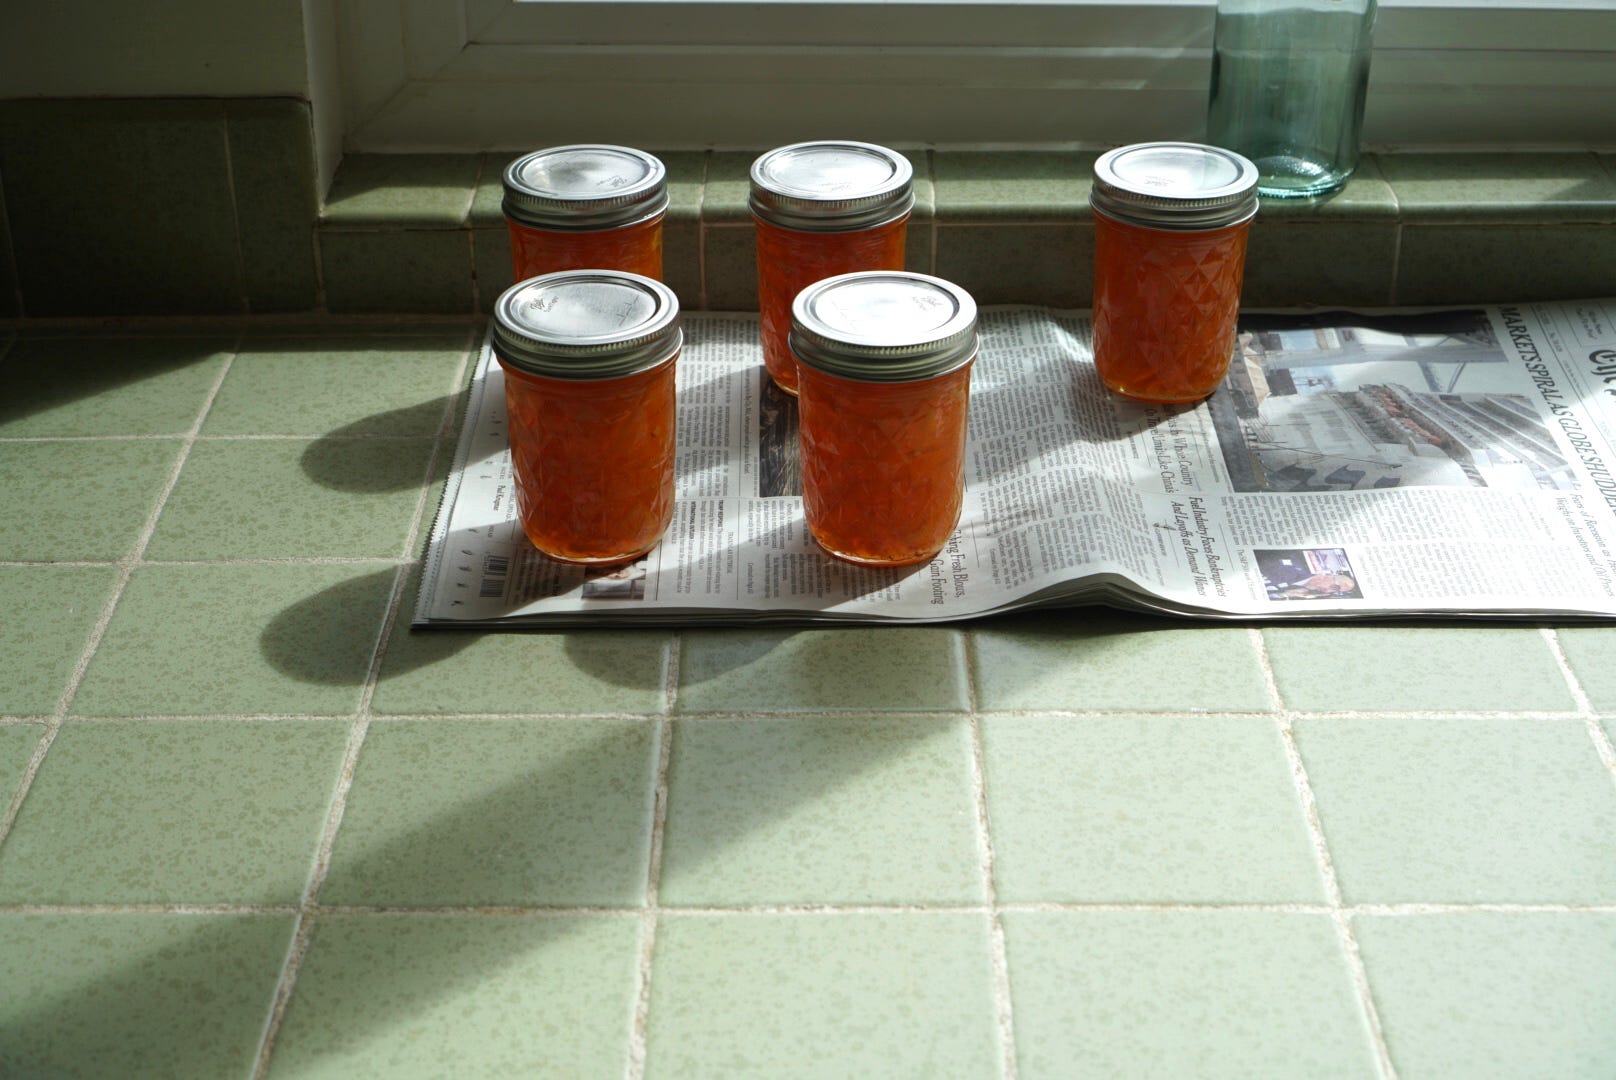
As it turns out there’s really not much more to marmalade than making jam, except that you cut the peel into strips, thick or thin, however you like it, then let sit overnight with the juices, some water, and all the odd bits (pith, seeds, pulp) in a muslin bag, tied to the side of the pot. In the morning, you boil, then simmer, this mixture to soften the peel and flavor the water, while your house fills with the bright scent of oranges. Squeeze the pouch to extract all the pectin rich juices, then discard. Add sugar and boil down, stirring often, till a small spoonful of the jam on a saucer that’s been in the freezer makes a blob like the Red Sea- that is, when you push your finger through it, the jam stays on one side and leaves a path through the middle intact. Ladle into clean, warm jars, screw lids on, and process 10 minutes in a boiling water canner for a long term seal. If you’re like me, save one jar out to eat immediately, on toast. Admire the rest of the jars shining their jewel tones on your pantry shelf, and be comforted. Whatever comes, there will be jam.
navel orange marmalade
I’ve tried my best to explain everything well, which makes it seem a little long and complicated, which it really isn’t. Sit down before you begin and read the recipe completely through first, so you know exactly what to expect, as when you make jam, things move quickly. This recipe is made with navel oranges from our tree- if you use store bought, be sure they don’t have a waxy coating. If you need to make marmalade with low sugar, I recommend buying a pack of Pomona’s Pectin and following their recipe included in the box.
2 ¼ lbs / 1 kg sweet oranges (this was about 4 large oranges for me)
one large lemon; or two small lemons
6 cups / 1.4 litres water
4 cups / 800 g sugar
¼ tsp sea salt5 sterilized jam jars + lids
With a sharp knife, cut the peels from the oranges, focusing on mostly taking off the orange part of the skin while leaving some of the white pith behind. You don’t need to be too dear about it, just don’t take all the pith. The more pith, the more bitter- I like my marmalade to have some bitterness to offset the sweet, but not a huge amount. Slice these peels into lengthwise strips, thin or thick, however you like your marmalade. Also, peel the lemon the same way, but taking care to take as little of the white pith as possible, and cut the lemon skin up into very small strips. Place both the orange and lemon strips in a large, nonreactive pot.
Juice the peeled oranges and lemons and add their juice to the pot (mine measured about 1 3/4 cups / 400 ml), reserving any seeds, pulp, and bits. Place these bits in a muslin or tight mesh bag (I used a cloth tea/coffee sock) along with the hollow, juiced halves. These bits are all high in pectin, and will contribute to thickening the jam without needing to use added pectin. Secure the bag to the handle of the pan. Pour in the water, mix a bit, then let sit overnight on the counter (cover with a lid). This helps the flavors from the peels to seep into the liquid, and makes for a tastier jam.
The next morning, set the pot on the stove, place 2 small saucers in the freezer, and bring your pot, with the bag in it (tie it tightly so it doesn’t come loose), to a boil. Reduce to a lively simmer, and cook until the peel is very soft, you should be able to pinch a piece and it squish easily- this should take around 15 minutes. Remove the muslin bag and let sit in a bowl to cool a bit so you can handle it, then using the back of a wooden spoon, press the bag against the side of the bowl, extracting most of the liquid, and add this liquid back to the pot. Discard contents of bag. Add the sugar and salt to the pot and mix well.
Now, for the jam. Give it a good stir again, bring it to a rolling boil, and let it boil away, stirring often to keep the bottom from burning. Keep cooking until it is set, which generally takes about 40ish minutes for me, but can be more or less, depending. If you have/would like to use a candy thermometer, it should reach 220°F / 104.5°C for a softer set, and 230°F / 110°C for a thicker set. How I do it is by eye- when I think it’s set, I turn off the pot heat, put a spoonful of jam on one of the cold plates from the freezer, swirl it around, replace plate in freezer, wait about 30 seconds, then swipe through the middle of the jam with my finger. If it crinkles on the surface and the jam stays mostly on the two sides without running back to the middle, it’s ready. If it’s not ready, turn the heat back on and check again in a few minutes. There’s a visual cue from the viscosity of the liquid, too- it gets slightly thicker when the jam is ready.
Remove the pot from the heat, and let sit for about 5 or 10 minutes (this settles it, making the peels able to be suspended and distributed evenly throughout). While you are waiting, make sure you have everything at the ready- clean jars, warm lids, a clean damp rag to wipe the rims of the jars, and your boiling water canner, if you are canning the jams.
Ladle into warm, clean jars (I use a canning funnel), and wipe down the rims to ensure they are clean of any drips of jam. Add the warm lids on the jars, screw on the rings, finger-tight, and either let cool to keep in fridge or process in a boiling water canner for 10 minutes (I recommend taking a look at the National Center for Home Food Preservation Site to familiarize yourself with techniques, here.) Wipe the jars down, and label/date them.